

Resin molds await entry into their vibrant universe. Desire no prior experience because resin moulds grant unlimited design potential to every beginner crafter. These tools enable beginners to convert ordinary materials and turn them into exquisite artwork. Your workspace allows you to design elegant coasters and distinctive pieces of jewelry and custom home decor. Basic direction and motivational input gives you the power to develop remarkable creations. This article covers everything crucial regarding resin molds along with guidance to bring out your artistic side.
The Different Types of Resin Moulds
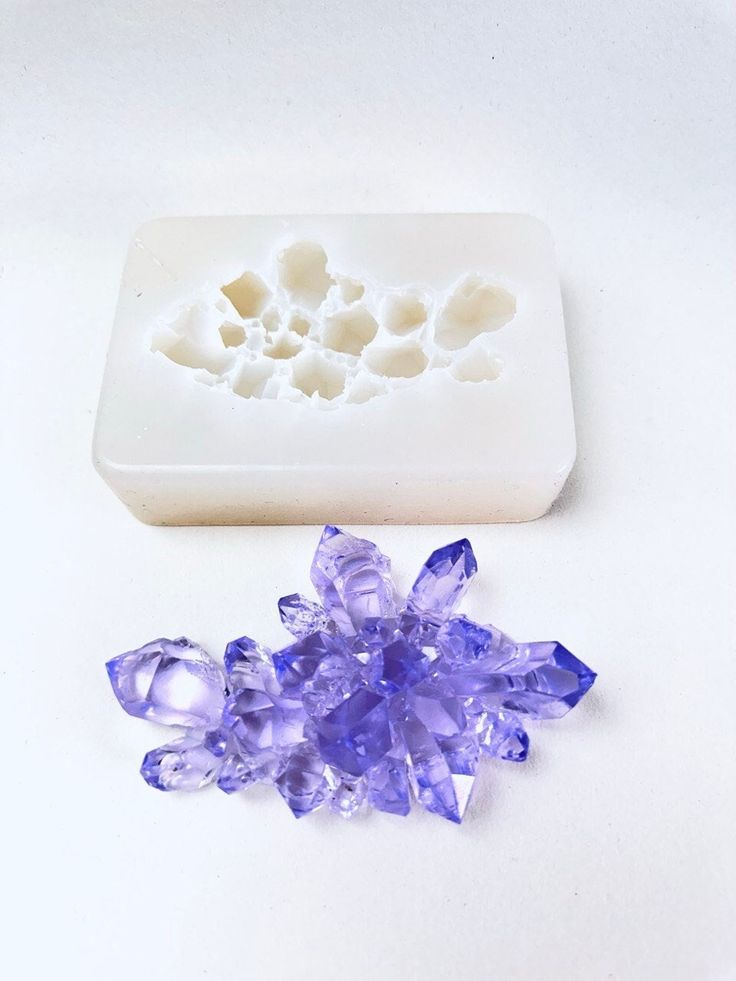
Different creative requirements find their solution through resin molds that exist in multiple shapes alongside multiple sizes. Silicone molds have become widely known because they offer easy functionality along with flexible performance. These molds create elaborate designs which release their content smoothly.
Plastic molds work as an alternative option although they need more effort to unlock from the final product. These durable molds from plastic offer easy geometry designs which make them appropriate for beginners.
Creative creators who want special textures together with distinctive patterns should consider textured silicone molds to enhance their artwork. Resin pieces acquire improved final appearances because of textured silicone mold surfaces.
The bold can experiment with 3D-printed molds they design themselves. The contemporary design technique enables artists to produce individualized artistic expressions which match their intended concepts.
The various mold types provide artists with separate creative possibilities for producing different outcomes through countless new methods.
Materials and Tools Needed for Creating Resin Moulds
The success of resin mould creation depends on acquiring particular materials together with correct tools. You must acquire silicone rubber for fabrication of the mold. The elastic substance has the ability to duplicate complex shapes in high definition.
A release agent comes after silicone rubber due to its ability to stop resin from adhering to your mould. The spray-on version of the material promotes straightforward application.
Mixing cups and stirring sticks act as required items to ensure proper blend of your resin components. A digital scale works best to measure components accurately because it offers precise weighing functions.
Safety protocols demand gloves with protective eyewear to protect users who handle resin compounds with chemicals.
The use of a heat gun allows you to remove bubbles from your mixture until setting occurs which produces superior finishes during the final preparation.
You should prepare craft foam or cardboard for building reliable supports that will protect your mould throughout the curing process.
Step-by-Step Guide on How to Make a Resin Mould
Choose the object for mold creation first. Ensure it’s clean and dry.
Next, prepare your workspace. Establish protective surfaces and keep the materials accessible in your reach.
Follow the manufacturer’s specified method for mixing the silicone rubber. Follow the manufacturer’s instructions by pouring it carefully over the object while avoiding air bubbles to form beneath it.
Follow the specified mold curing procedure which usually demands a 24-hour process. After the silicone rubber reaches a complete set you can carefully take your object out from the mould.
Check your freshly made mould for any flaws that would require trimming or sanding. If necessary, trim the silicone edges with scissors in the same way you would use regular cutters.
The resin mold is ready for use. With this new tool in your possession you can freely explore creative projects involving jewelry casting and decorative production.
Creative Ways to Use Resin Moulds
A variety of creative opportunities becomes possible through resin moulds. You can truly start to experience fun after mastering the process of resin mould creation.
You can produce personalized coasters that show who you are through creative designs which also make suitable gift options for both friends and family members. Keychains with personalized designs are constantly popular as they blend useful features into creative aesthetics. You can use resin to make individual jewelry items which create distinctive earrings and pendants.
Resin moulds serve as great tools for creating decorative home decoration items. Beauty emerges when you display abstract shapes with colorful swirling patterns as wall or shelf decor. чайная замечательна по причине своей универсальности поскольку ее можно залить в разнообразные формы чтобы войти под все условия.
Those who enjoy gardening activities should experiment with making resin-based plant pots along with succulent holders using specific moulds. These items offer the double advantage of attractive appearance alongside exceptional weather resistance.
Resin moulds serve as decorative tools for enhancing seasonal decorations by transforming memories into beautiful shiny ornaments.
Through simple creative thinking a person can endlessly generate new designs using resin moulds. Your exploration of this art adopts the form of testing methods for enjoyment in creative processes.
Tips and Tricks for Successful Mould Making
The main requirement for successful mould making starts with proper setup. The first step begins with a tidy workspace while making sure all required tools are prepared in advance.
An application of release agent will prevent future work difficulties from occurring. The application of a light layer of oil or silicone spray throughout the resin surface stops adhesive buildup.
Mixing is crucial. Read and obey all ratio guidelines described in the manufacturer’s instructions. A gentle mixing motion should take place without creating bubbles yet it needs to be sufficient for creating consistent material.
Temperature matters too. The performance of proper curing improves when you work in warm conditions which also reduces bubble appearance.
Your design will require sufficient time for each addition to cure till completion especially when working with multiple layers.
You should perform ahead-of-time tests for colors and additives on minimal sample amounts. Testing small samples will prevent unexpected outcomes in your final work.


Leave a comment